Thinking about switching from Localize to LingoJs? You're not alone. Many teams are making the move for better pricing, faster performance, and smarter contextual AI. The good news: migrating your existing translations is straightforward and takes just a few minutes.
This guide walks you through every step of the migration process, from exporting your Localize data to importing it into LingoJs.
Prerequisites
Before starting the migration, make sure you have:
- A Localize account with an existing project containing your translations.
- A LingoJs account ready to receive your translations.
If you don't have a LingoJs account yet, creating one takes less than 2 minutes. Head to the LingoJs registration, fill in your information or use Google authentication for instant access. Once logged in, you'll be prompted to enter an organization name. After completing this step, you'll land in the LingoJs dashboard, which you'll find pleasantly similar to Localize. This familiar interface makes the transition natural and keeps your team's learning curve minimal.
Step 1: Export Your Translations from Localize
Now comes the simple part: getting your data out of Localize.
- Navigate to the project you want to migrate in your Localize dashboard.
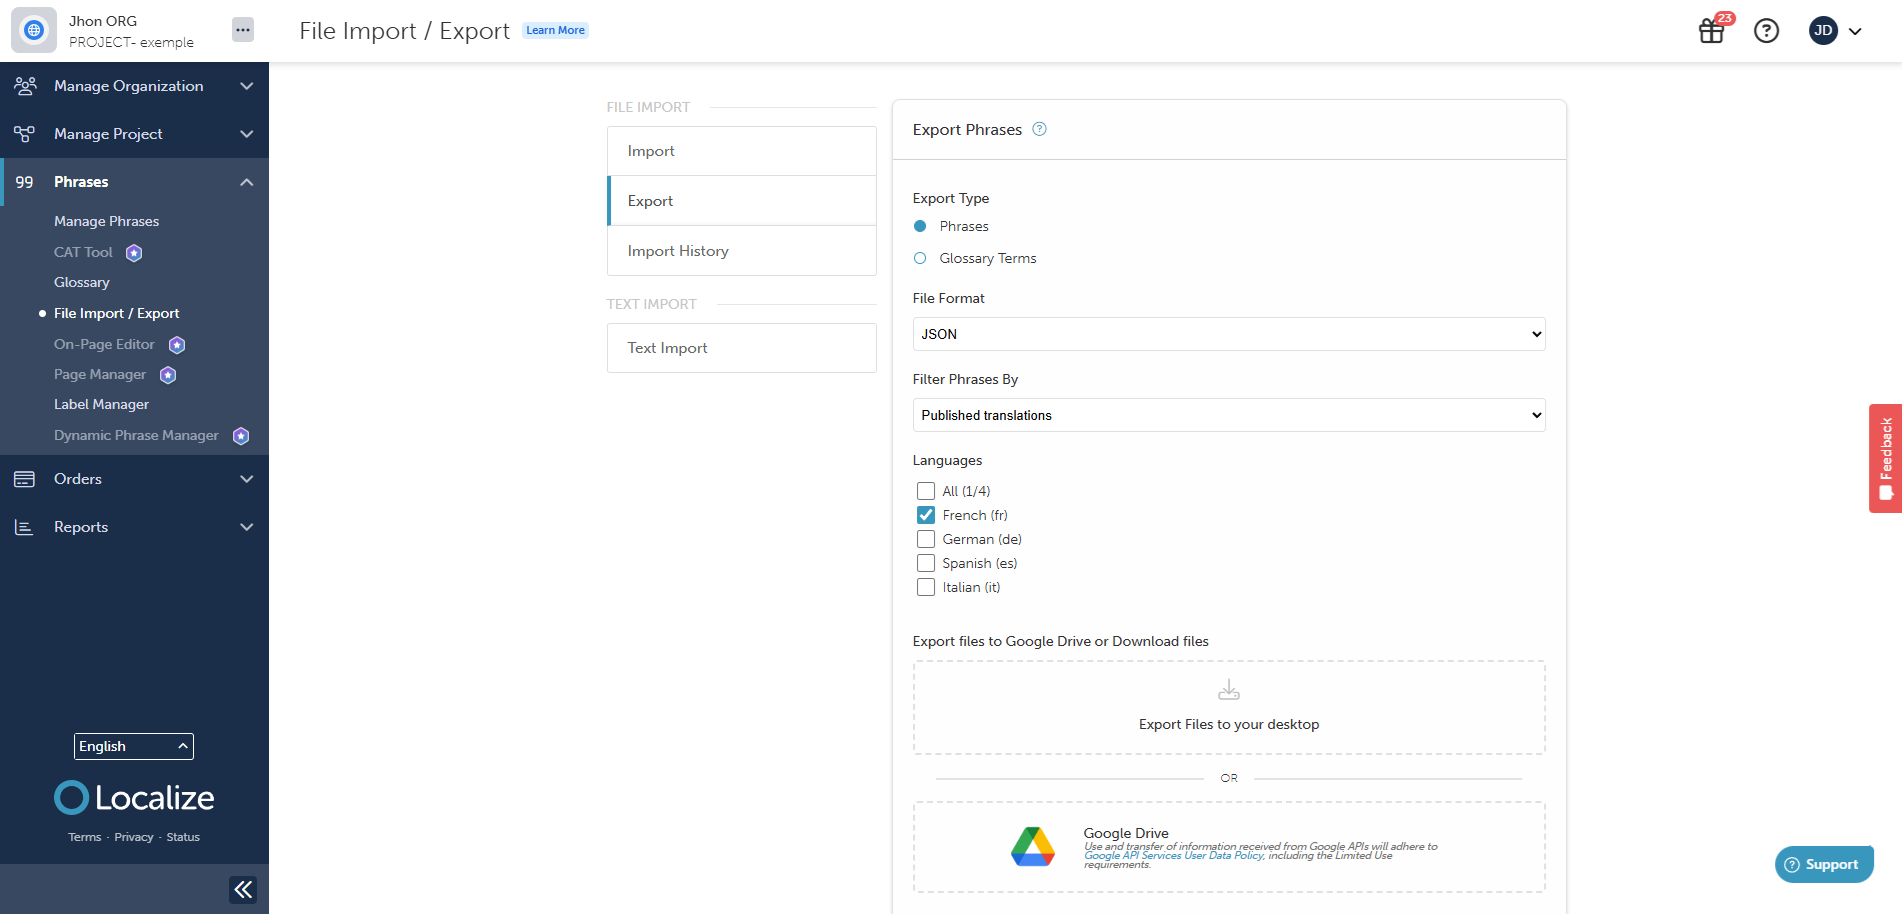
- In the left sidebar menu, click on Phrases, then select File Import/Export.
-
On this page, you'll see two tabs at the top. Click on the Export tab.
-
Configure your export settings:
- Export Type: Select "Phrases"
- File Format: Choose "JSON"
- Filter Phrases By: Set to "Published Translations"
-
Here's the important part: due to a known bug in Localize, you need to export languages one at a time. If you select all languages at once, Localize will only export the first language, ignoring the rest.
-
Click Export Files to Your Desktop, then press the Export Files button.
-
Save the JSON file to a location on your computer where you can easily find it.
-
Repeat this entire process for each language in your project.
Yes, it's tedious (another reason to switch to LingoJs), but it ensures you capture all your translation data correctly.
Step 2: Import Your Translations into LingoJs
With your JSON files ready, head over to your LingoJs dashboard.
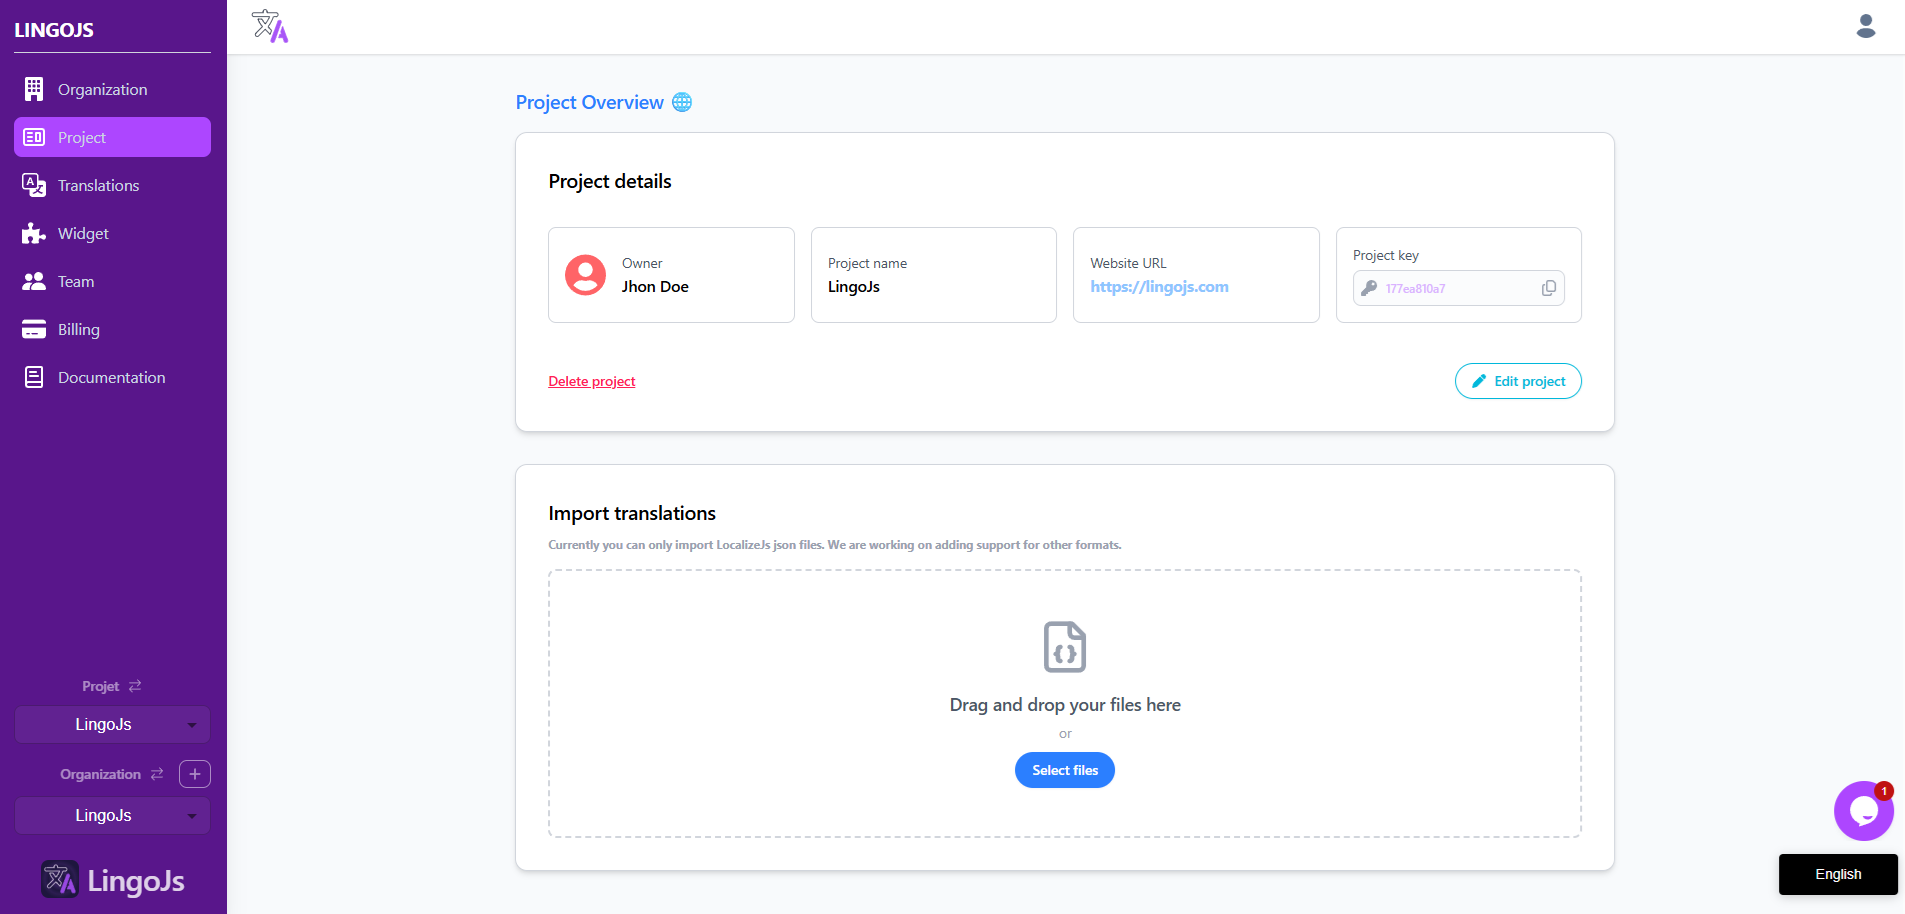
- In the bottom left menu, you'll see a project selector. Click on it and choose the project where you want to import your translations.
- This takes you to your project's main page.
-
Look for the Select File button on this page.
-
Click it and choose one of the JSON files you exported from Localize.
-
Press Start Import and wait a few seconds while LingoJs processes your translations. The import time depends on the size of your file, but even large translation sets typically complete within moments.
-
When the import finishes, navigate to your Translations page in the LingoJs dashboard. You should see all your translations from Localize now available in LingoJs.
-
Repeat this import process for each language file you exported from Localize.
The data structure remains intact, so your keys, values, and organization carry over seamlessly.
What Happens Next
Once all your translations are imported, you're ready to start using LingoJs. Your team can immediately benefit from:
- Contextual AI translations that understand your project's specific terminology and tone, unlike Localize's generic Google Translate integration.
- Faster performance with client-side translation delivery averaging around 26ms, keeping your Core Web Vitals healthy.
- Transparent pricing without the surprise volume-based charges that can make Localize unexpectedly expensive as you scale.
- A cleaner interface that focuses on getting work done rather than navigating complex enterprise workflows you might not need.
Tips for a Smooth Transition
- Before deactivating your Localize account, verify that all languages imported correctly by spot-checking key translations in LingoJs.
- Update your website's integration by replacing the Localize JS tag with the LingoJs tag. This typically takes just a few minutes and requires no code restructuring.
- Inform your team about the new dashboard URL and any workflow changes. The interface similarity means minimal training is needed.
Welcome to LingoJs
That's it. Your migration is complete.
You've successfully moved your translation work to a platform built for modern web development, offering better AI, clearer pricing, and faster performance. Your localization process just got simpler.
Welcome to LingoJs. We hope you enjoy a better internationalization experience.
Need help or have questions about your migration? Reach out to our team at LingoJs Contact.